Introduction
Arduino is an open-source electronics platform that empowers you to create interactive projects. It consists of two main components:
-
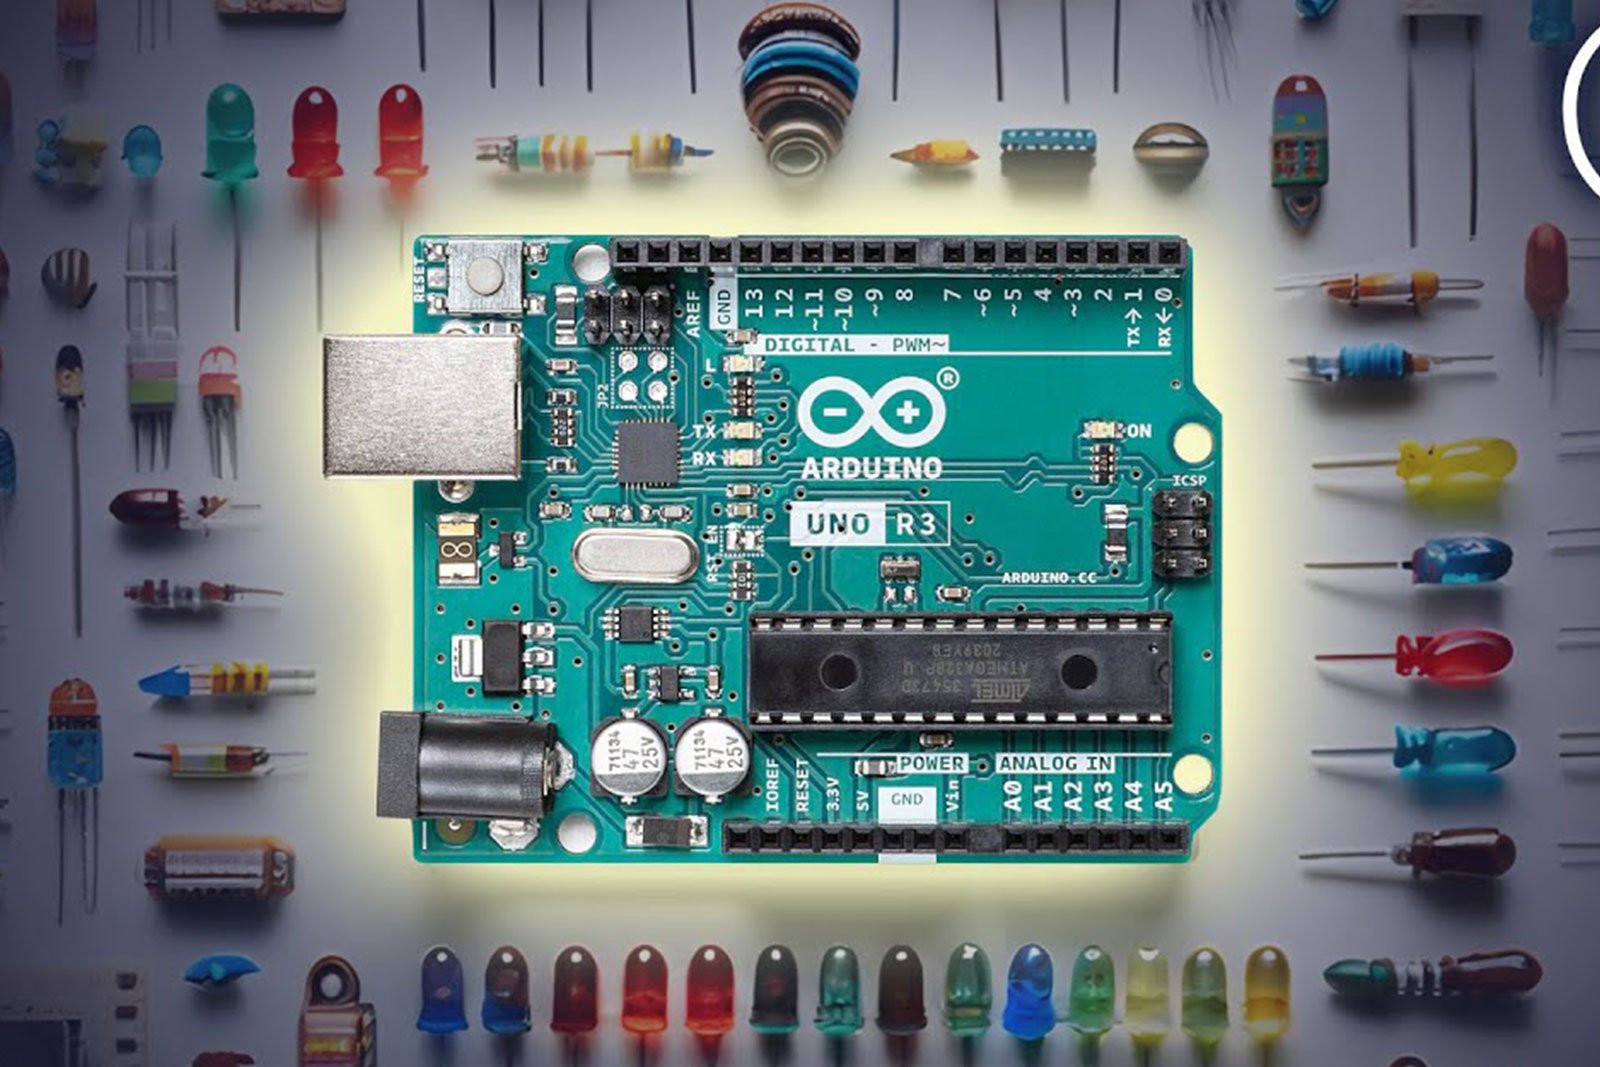
Physical Circuit Board (Microcontroller): This tiny computer brain serves as the heart of your project. The Arduino Uno is a popular and beginner-friendly option in this category.
-
Software (IDE): Installed on your computer, this user-friendly environment lets you write and upload code to the microcontroller board.
Why Arduino Stands Out for Beginners:
-
Simple Setup: Forget complex hardware programmers! Arduino uses a standard USB cable to load code onto the board.
-
Easy Programming: The Arduino IDE uses a simplified version of C++, making it easier to learn to code, even for those with no prior experience.
-
Accessible Design: Arduino boards have a standardized design, making it easier to understand and connect different components.
What Can You Do with Arduino?
The possibilities with Arduino are endless! You can build projects like:
-
Interactive Devices: Control lights, motors, and sensors to create responsive projects.
-
Data Logging: Collect and store data from sensors for analysis.
-
Home Automation: Automate tasks like controlling lights, appliances, and security systems.
-
Wearable Electronics: Design interactive clothing and accessories.
-
Art Installations: Create captivating and immersive art pieces.
Anatomy of an Arduino Board:
Let’s explore the key components found on a typical Arduino board:
-
Power Supply: Provides the necessary voltage to power the board. Common options include USB and barrel jack connectors.
-
Input/Output (I/O) Pins: These pins allow you to connect various electronic components, such as sensors, actuators, and LEDs.
-
Analog Pins: Designed for analog signals, which represent continuous values like voltage or temperature.
-
Digital Pins: Handle digital signals, which represent on/off states like high (1) or low (0).
-
-
Microcontroller Unit (MCU): The brain of the Arduino, responsible for executing your code and controlling the board’s functions.
-
Reset Button: Used to restart the Arduino and reinitialize the program.
-
LED Indicators: Provide visual feedback on the board’s status, such as power and data transfer.
Types of Arduino Boards:
Arduino offers a diverse range of boards catering to different needs and skill levels. Here are a few popular options:
-
Arduino Uno: A versatile and beginner-friendly board, ideal for starting your Arduino journey.
-
Arduino Nano: A compact and lightweight board suitable for small-scale projects.
-
Arduino Mega: A board with more I/O pins, perfect for projects requiring multiple sensors or actuators.
-
LilyPad Arduino: A flexible and wearable board designed for integrating electronics into clothing.
Getting Started with Arduino:
-
Gather the Essentials: Acquire an Arduino board, a USB cable, and a computer with Arduino IDE installed.
-
Choose a Project: Select a beginner-friendly project to get started, such as blinking an LED or reading sensor data.
-
Write the Code: Use the Arduino IDE to write code that instructs the board how to perform the desired actions.
-
Upload the Code: Connect the Arduino board to your computer, and upload the code to the board using the Arduino IDE.
-
Test and Refine: Run your project and make adjustments to the code as needed to achieve the desired outcome.
Arduino Resources:
-
Arduino Official Website: https://forum.arduino.cc/t/sending-midi-cc-value/686355
-
Arduino IDE Download: https://support.arduino.cc/hc/en-us/articles/360019833020-Download-and-install-Arduino-IDE
-
Arduino Tutorials: https://projecthub.arduino.cc/
-
Arduino Community Forums: https://forum.arduino.cc/
Conclusion:
Arduino is an empowering platform that opens up a world of possibilities for creative exploration and learning. With its user-friendly approach and vast community support, Arduino makes electronics accessible to anyone, regardless of their background or experience. Embrace the Arduino journey and embark on exciting projects that bring your ideas to life!

