[match_prediction match_id="3"]

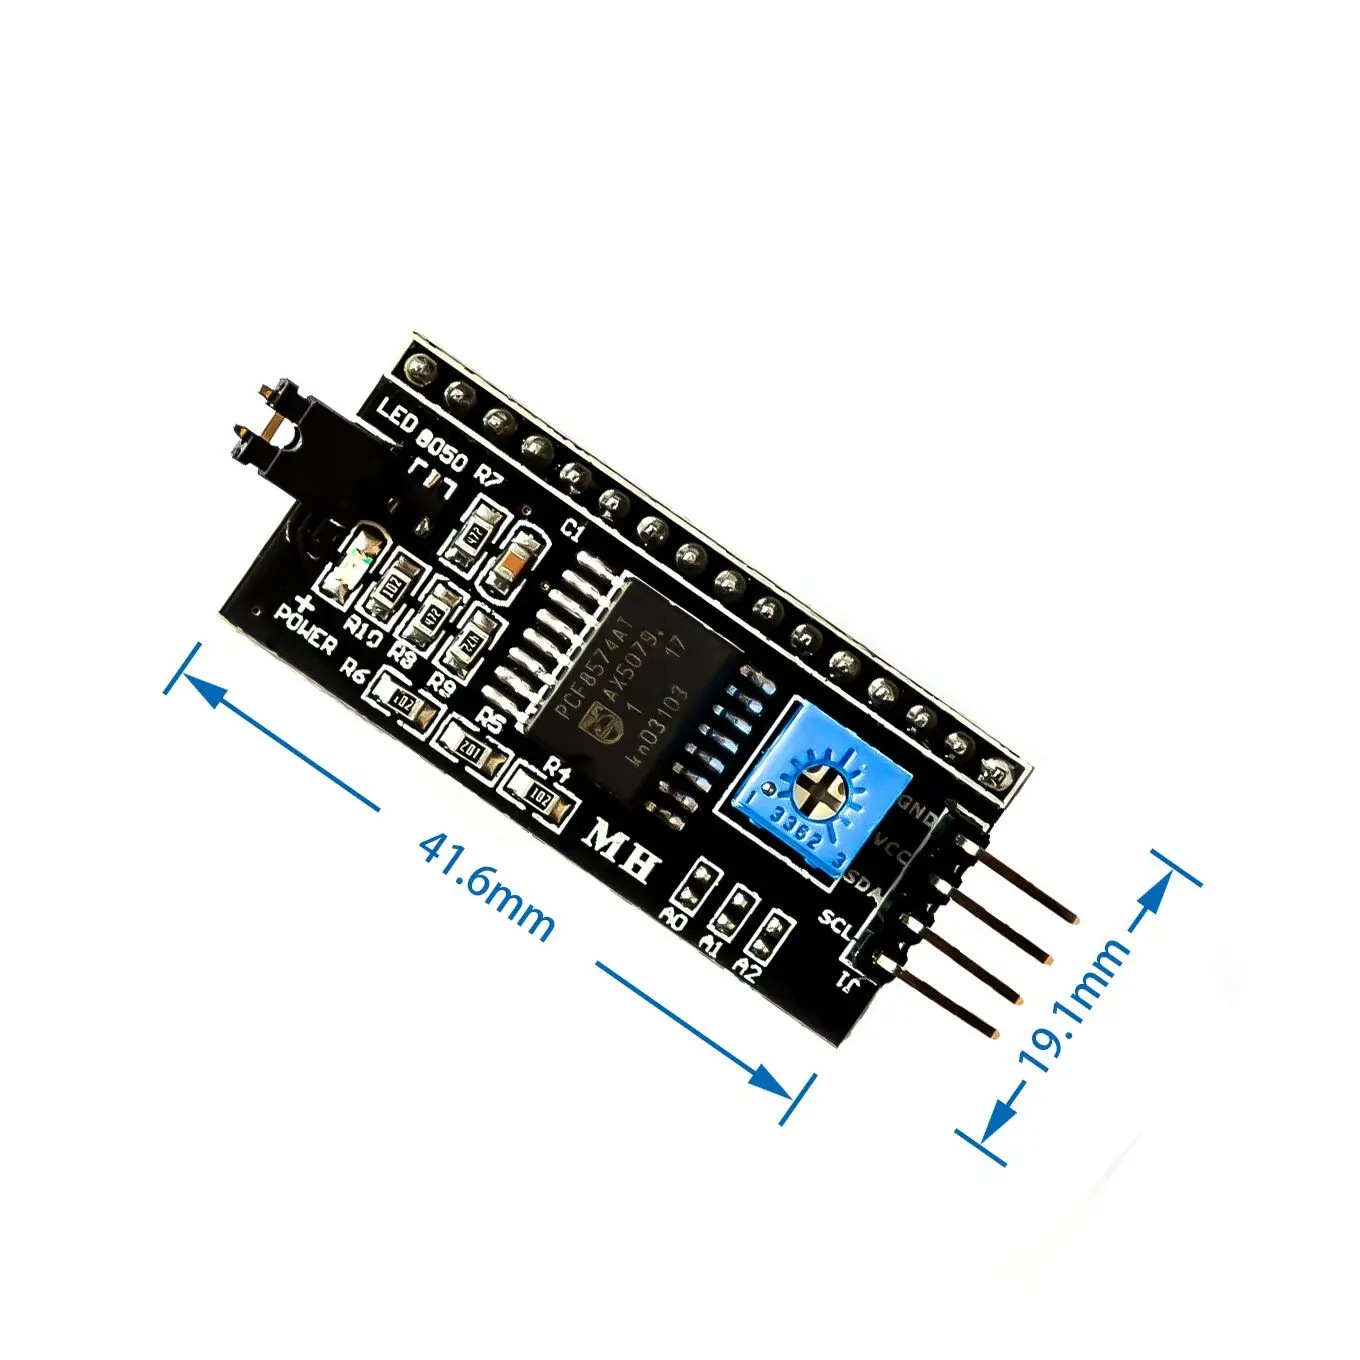
I2C LCD Adapter Board (PCF8574) – 16×2 / 20×4

  1. 5V power supply.
  2. Serial I2C control of LCD display using PCF8574.
  3. Backlight can be enabled or disabled via a jumper on the board.
  4. Contrast control via a potentiometer.
  5. Can have 8 modules on a single I2C bus (change address via solder jumpers)address, allowing.
SKU: AA134 Categories: ,

60,00 EGP

17 People watching this product now!

Frequently Bought Together

60,00 EGP
70,00 EGP
130,00 EGP
For 2 items

Description

This is a RoHS compliant I2C Serial LCD Daughter board that can be connected to a standard 16×2 or 20×4 Character Display Module that supports 4-bit mode. All Character Modules sold on our site support 4-bit mode, and nearly all commercially available 16×2 and 20×4 line character modules support it too.

This board has a PCF8574 I2C chip that converts I2C serial data to parallel data for the LCD display. There are many examples on the internet for using this board with Arduino. Do a search for “Arduino LCD PCF8574“. The I2C address is 0x3F by default, but this can be changed via 3 solder jumpers provided on the board. This allows up to 3 LCD displays to be controlled via a single I2C bus (giving each one it’s own address)


Specifications and Features:

  1. 5V power supply.
  2. Serial I2C control of LCD display using PCF8574.
  3. Backlight can be enabled or disabled via a jumper on the board.
  4. Contrast control via a potentiometer.
  5. Can have 8 modules on a single I2C bus (change address via solder jumpers)address, allowing.
  6. Size :41.6 x 19.2 mm.

Package Includes:

1 x IIC/I2C Serial Interface Adapter Module

🔌
Pin Connections
1 Table
Pin Connections Table 1
Board NamePCF8574 I2C LCDConnection Details (Voltage Notes)
Arduino UnoPCF8574VCC->5V, GND->GND, SDA->A4, SCL->A5. 5V logic, direct connection.
Arduino NanoPCF8574VCC->5V, GND->GND, SDA->A4, SCL->A5. 5V logic, direct connection.
Arduino MegaPCF8574VCC->5V, GND->GND, SDA->20, SCL->21. 5V logic, direct connection.
ESP32PCF8574VCC->5V (VIN), GND->GND, SDA->21, SCL->22. 3.3V logic; use level shifter (e.g., TXB0108) on SDA/SCL lines. Alternatively, power PCF8574 at 3.3V if LCD supports it.
ESP8266PCF8574VCC->5V (VIN), GND->GND, SDA->4 (D2), SCL->5 (D1). 3.3V logic; level shifter recommended.
STM32PCF8574VCC->5V (VBUS), GND->GND, SDA->PB7, SCL->PB6 (default). 3.3V logic; level shifter recommended.
Raspberry Pi PicoPCF8574VCC->5V (VBUS), GND->GND, SDA->0 (I2C0), SCL->1 (I2C0). 3.3V logic; level shifter recommended.
📟
I2C LCD Adapter (PCF8574) 16x2/20x4
7 Examples • C/C++ | Boards: Arduino Uno, Arduino Nano, Arduino Mega, ESP32, ESP8266, STM32, Raspberry Pi Pico
I2C LCD - Arduino Uno
I2C LCD - Arduino Nano
I2C LCD - Arduino Mega
I2C LCD - ESP32
I2C LCD - ESP8266
I2C LCD - STM32
I2C LCD - Raspberry Pi Pico
Code Comments:
Code for Arduino Uno with 16x2 LCD via PCF8574
📄 File: i2c_lcd_-_arduino_uno_arduino_uno.inoArduino Uno
890 characters
1/*
2 * ekostra.com
3 * ekostra electronics store in egypt
4 */
5
6#include <Wire.h>
7#include <LiquidCrystal_I2C.h>
8
9// Set the LCD address (commonly 0x27 or 0x3F)
10#define LCD_ADDR 0x27
11// Define LCD dimensions (change to 20,4 if using 20x4)
12#define LCD_COLS 16
13#define LCD_ROWS 2
14
15// Create LCD objectnLiquidCrystal_I2C lcd(LCD_ADDR, LCD_COLS, LCD_ROWS);
16
17void setup() {
18 // Initialize serial monitor for debuggingn Serial.begin(115200);
19
20 // Initialize I2C (default pins A4/A5 for Uno)
21 Wire.begin();
22
23 // Initialize LCDn lcd.init();
24 // Turn on backlightn lcd.backlight();
25 // Clear screenn lcd.clear();
26
27 // Print welcome messagen lcd.setCursor(0, 0);
28 lcd.print("Hello, World!");
29 lcd.setCursor(0, 1);
30 lcd.print("Count: ");
31}
32
33void loop() {
34 static int count = 0;
35 // Display counter at column 7, row 1
36 lcd.setCursor(7, 1);
37 lcd.print(count);
38 delay(1000);
39 count++;
40}
Code Comments:
Code for Arduino Nano with 16x2 LCD via PCF8574
📄 File: i2c_lcd_-_arduino_nano_arduino_nano.inoArduino Nano
891 characters
1/*
2 * ekostra.com
3 * ekostra electronics store in egypt
4 */
5
6#include <Wire.h>
7#include <LiquidCrystal_I2C.h>
8
9// Set the LCD address (commonly 0x27 or 0x3F)
10#define LCD_ADDR 0x27
11// Define LCD dimensions (change to 20,4 if using 20x4)
12#define LCD_COLS 16
13#define LCD_ROWS 2
14
15// Create LCD objectnLiquidCrystal_I2C lcd(LCD_ADDR, LCD_COLS, LCD_ROWS);
16
17void setup() {
18 // Initialize serial monitor for debuggingn Serial.begin(115200);
19
20 // Initialize I2C (default pins A4/A5 for Nano)
21 Wire.begin();
22
23 // Initialize LCDn lcd.init();
24 // Turn on backlightn lcd.backlight();
25 // Clear screenn lcd.clear();
26
27 // Print welcome messagen lcd.setCursor(0, 0);
28 lcd.print("Hello, World!");
29 lcd.setCursor(0, 1);
30 lcd.print("Count: ");
31}
32
33void loop() {
34 static int count = 0;
35 // Display counter at column 7, row 1
36 lcd.setCursor(7, 1);
37 lcd.print(count);
38 delay(1000);
39 count++;
40}
Code Comments:
Code for Arduino Mega with 16x2 LCD via PCF8574
📄 File: i2c_lcd_-_arduino_mega_arduino_mega.inoArduino Mega
891 characters
1/*
2 * ekostra.com
3 * ekostra electronics store in egypt
4 */
5
6#include <Wire.h>
7#include <LiquidCrystal_I2C.h>
8
9// Set the LCD address (commonly 0x27 or 0x3F)
10#define LCD_ADDR 0x27
11// Define LCD dimensions (change to 20,4 if using 20x4)
12#define LCD_COLS 16
13#define LCD_ROWS 2
14
15// Create LCD objectnLiquidCrystal_I2C lcd(LCD_ADDR, LCD_COLS, LCD_ROWS);
16
17void setup() {
18 // Initialize serial monitor for debuggingn Serial.begin(115200);
19
20 // Initialize I2C (default pins 20/21 for Mega)
21 Wire.begin();
22
23 // Initialize LCDn lcd.init();
24 // Turn on backlightn lcd.backlight();
25 // Clear screenn lcd.clear();
26
27 // Print welcome messagen lcd.setCursor(0, 0);
28 lcd.print("Hello, World!");
29 lcd.setCursor(0, 1);
30 lcd.print("Count: ");
31}
32
33void loop() {
34 static int count = 0;
35 // Display counter at column 7, row 1
36 lcd.setCursor(7, 1);
37 lcd.print(count);
38 delay(1000);
39 count++;
40}
Code Comments:
Code for ESP32 with 16x2 LCD via PCF8574 – level shifter required for 5V I2C
📄 File: i2c_lcd_-_esp32_esp32.inoESP32
977 characters
1/*
2 * ekostra.com
3 * ekostra electronics store in egypt
4 */
5
6#include <Wire.h>
7#include <LiquidCrystal_I2C.h>
8
9// Set the LCD address (commonly 0x27 or 0x3F)
10#define LCD_ADDR 0x27
11// Define LCD dimensions (change to 20,4 if using 20x4)
12#define LCD_COLS 16
13#define LCD_ROWS 2
14
15// ESP32 I2C pins (default: SDA=21, SCL=22)
16#define I2C_SDA 21
17#define I2C_SCL 22
18
19// Create LCD objectnLiquidCrystal_I2C lcd(LCD_ADDR, LCD_COLS, LCD_ROWS);
20
21void setup() {
22 // Initialize serial monitor for debuggingn Serial.begin(115200);
23
24 // Initialize I2C with custom pinsn Wire.begin(I2C_SDA, I2C_SCL);
25
26 // Initialize LCDn lcd.init();
27 // Turn on backlightn lcd.backlight();
28 // Clear screenn lcd.clear();
29
30 // Print welcome messagen lcd.setCursor(0, 0);
31 lcd.print("Hello, World!");
32 lcd.setCursor(0, 1);
33 lcd.print("Count: ");
34}
35
36void loop() {
37 static int count = 0;
38 // Display counter at column 7, row 1
39 lcd.setCursor(7, 1);
40 lcd.print(count);
41 delay(1000);
42 count++;
43}
Code Comments:
Code for ESP8266 with 16x2 LCD via PCF8574 – level shifter recommended
📄 File: i2c_lcd_-_esp8266_esp8266.inoESP8266
980 characters
1/*
2 * ekostra.com
3 * ekostra electronics store in egypt
4 */
5
6#include <Wire.h>
7#include <LiquidCrystal_I2C.h>
8
9// Set the LCD address (commonly 0x27 or 0x3F)
10#define LCD_ADDR 0x27
11// Define LCD dimensions (change to 20,4 if using 20x4)
12#define LCD_COLS 16
13#define LCD_ROWS 2
14
15// ESP8266 I2C pins (SDA=GPIO4/D2, SCL=GPIO5/D1)
16#define I2C_SDA 4
17#define I2C_SCL 5
18
19// Create LCD objectnLiquidCrystal_I2C lcd(LCD_ADDR, LCD_COLS, LCD_ROWS);
20
21void setup() {
22 // Initialize serial monitor for debuggingn Serial.begin(115200);
23
24 // Initialize I2C with custom pinsn Wire.begin(I2C_SDA, I2C_SCL);
25
26 // Initialize LCDn lcd.init();
27 // Turn on backlightn lcd.backlight();
28 // Clear screenn lcd.clear();
29
30 // Print welcome messagen lcd.setCursor(0, 0);
31 lcd.print("Hello, World!");
32 lcd.setCursor(0, 1);
33 lcd.print("Count: ");
34}
35
36void loop() {
37 static int count = 0;
38 // Display counter at column 7, row 1
39 lcd.setCursor(7, 1);
40 lcd.print(count);
41 delay(1000);
42 count++;
43}
Code Comments:
Code for STM32 (Blue Pill) with 16x2 LCD via PCF8574 – level shifter recommended
📄 File: i2c_lcd_-_stm32_stm32.inoSTM32
990 characters
1/*
2 * ekostra.com
3 * ekostra electronics store in egypt
4 */
5
6#include <Wire.h>
7#include <LiquidCrystal_I2C.h>
8
9// Set the LCD address (commonly 0x27 or 0x3F)
10#define LCD_ADDR 0x27
11// Define LCD dimensions (change to 20,4 if using 20x4)
12#define LCD_COLS 16
13#define LCD_ROWS 2
14
15// STM32 (Blue Pill) default I2C pins: SDA=PB7, SCL=PB6
16// We'll use default Wire.begin() without argumentsnn// Create LCD objectnLiquidCrystal_I2C lcd(LCD_ADDR, LCD_COLS, LCD_ROWS);
17
18void setup() {
19 // Initialize serial monitor for debuggingn Serial.begin(115200);
20
21 // Initialize I2C (uses default pins)
22 Wire.begin();
23
24 // Initialize LCDn lcd.init();
25 // Turn on backlightn lcd.backlight();
26 // Clear screenn lcd.clear();
27
28 // Print welcome messagen lcd.setCursor(0, 0);
29 lcd.print("Hello, World!");
30 lcd.setCursor(0, 1);
31 lcd.print("Count: ");
32}
33
34void loop() {
35 static int count = 0;
36 // Display counter at column 7, row 1
37 lcd.setCursor(7, 1);
38 lcd.print(count);
39 delay(1000);
40 count++;
41}
Code Comments:
Code for Raspberry Pi Pico with 16x2 LCD via PCF8574 – level shifter recommended
📄 File: i2c_lcd_-_raspberry_pi_pico_raspberry_pi_pico.inoRaspberry Pi Pico
980 characters
1/*
2 * ekostra.com
3 * ekostra electronics store in egypt
4 */
5
6#include <Wire.h>
7#include <LiquidCrystal_I2C.h>
8
9// Set the LCD address (commonly 0x27 or 0x3F)
10#define LCD_ADDR 0x27
11// Define LCD dimensions (change to 20,4 if using 20x4)
12#define LCD_COLS 16
13#define LCD_ROWS 2
14
15// Raspberry Pi Pico I2C0 pins: SDA=GP0, SCL=GP1
16#define I2C_SDA 0
17#define I2C_SCL 1
18
19// Create LCD objectnLiquidCrystal_I2C lcd(LCD_ADDR, LCD_COLS, LCD_ROWS);
20
21void setup() {
22 // Initialize serial monitor for debuggingn Serial.begin(115200);
23
24 // Initialize I2C with custom pinsn Wire.begin(I2C_SDA, I2C_SCL);
25
26 // Initialize LCDn lcd.init();
27 // Turn on backlightn lcd.backlight();
28 // Clear screenn lcd.clear();
29
30 // Print welcome messagen lcd.setCursor(0, 0);
31 lcd.print("Hello, World!");
32 lcd.setCursor(0, 1);
33 lcd.print("Count: ");
34}
35
36void loop() {
37 static int count = 0;
38 // Display counter at column 7, row 1
39 lcd.setCursor(7, 1);
40 lcd.print(count);
41 delay(1000);
42 count++;
43}
Example project for driving a 16x2 or 20x4 LCD with PCF8574 I2C backpack on multiple boards. Includes voltage level shifting guidance for 3.3V boards.
[acf_vc_integrator get_field_data_from="" field_group="25154" field_from_25154="field_694d5bea250d3" show_label="default" align="default" gallery_columns="" gm_show_placecard="default" gm_map_type_control="default" gm_fullscreen_control="default" gm_street_view_control="default" gm_zoom_control="default" gm_scale="default" hidden_field_name="ARDUINO CODE"]
هذا الوصف والمواصفات تمت كتابته بمساعدة الذكاء الاصطناعي، يُرجى مراجعته قبل الشراء.
برجاء تأكيد الطلب على الواتساب للتأكد من توفر المخزون قبل الدفع

Specification

General

WeightWeight4,0000 g
Dimensions42 × 20 cm
TypeI2C Serial LCD Interface Adapter
Compatible LCD Size16×2 / 20×4 Character LCD
LCD Mode4-bit Mode
Controller ICPCF8574
Communication InterfaceI2C
Operating Voltage5V
Default I2C Address0x3F
Address SelectionVia 3 Solder Jumpers
Maximum Devices on I2C BusUp to 8 Modules
Backlight ControlJumper Enabled / Disabled
Contrast AdjustmentOn-board Potentiometer
RoHS ComplianceYes
ApplicationArduino and Microcontroller Projects
الأبعاد41.6×19.2×8 (mm) مم (الطول: 4.16 سم، العرض: 1.92 سم، الارتفاع: 0.8 سم)
الوزن5 جرام (0.005 كجم)
Package Includes1 x I2C Serial Interface Adapter Module

Customer Reviews