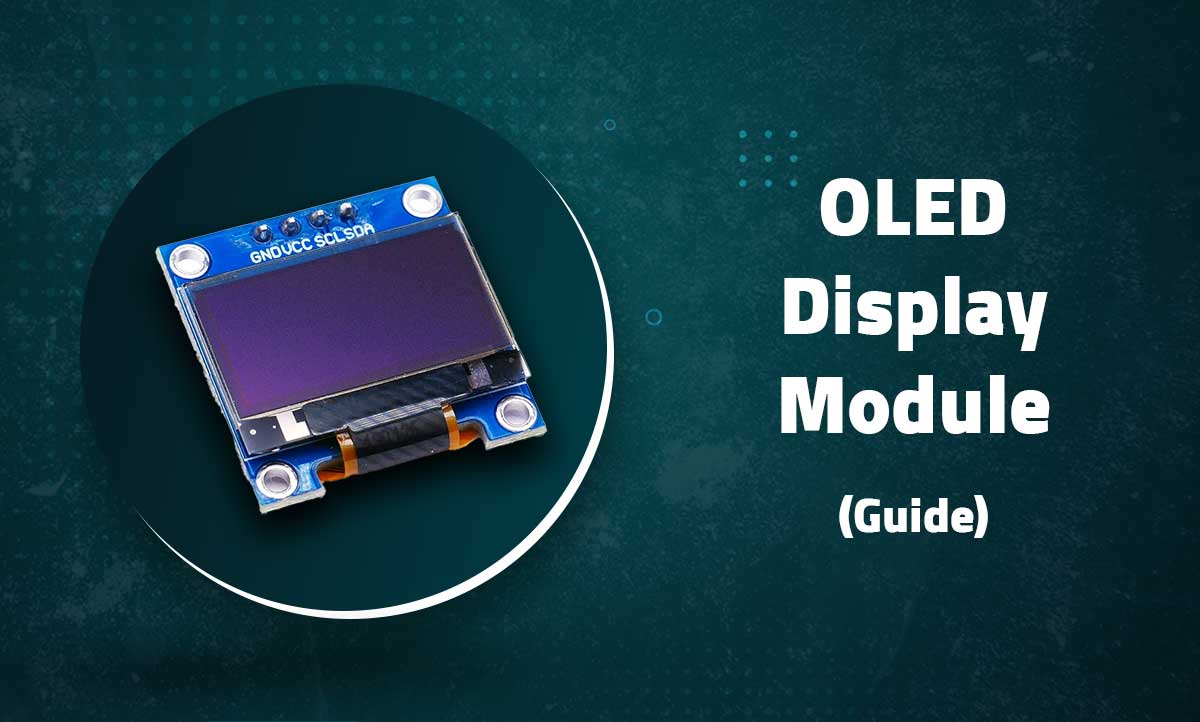
0.96″ OLED Display Module (128×64) Complete Guide
High-Contrast Display Solution for Arduino and ESP Projects
Introduction
The 0.96″ OLED display module is a popular, low-power display solution featuring a 128×64 pixel resolution with crisp white, blue, or yellow pixels on a black background. These displays use SSD1306 or SH1106 drivers and communicate via I2C or SPI interfaces.

Key Features
Power Efficiency
Consumes only 0.04W during operation
High Contrast
16:1 contrast ratio for excellent readability
Compact Size
27.3mm × 27.8mm module dimensions
Built-in Memory
GDDRAM for display data storage
Technical Specifications
| Display Type | OLED (Organic LED) |
|---|---|
| Resolution | 128 × 64 pixels |
| Driver IC | SSD1306 or SH1106 |
| Interface | I2C (default) or SPI |
| Operating Voltage | 3.3V – 5V |
| Viewing Angle | >160° |
Pin Configuration

| Pin | Description | Arduino Connection |
|---|---|---|
| GND | Ground | GND |
| VCC | Power (3.3V-5V) | 3.3V or 5V |
| SCL | I2C Clock | A5 (Uno) or SCL |
| SDA | I2C Data | A4 (Uno) or SDA |
Note: Some modules have additional pins for SPI interface (D/C, RST, CS)
Wiring with Arduino
I2C Connection

// Basic I2C Connections:
// OLED VCC → Arduino 5V
// OLED GND → Arduino GND
// OLED SCL → Arduino SCL (A5 on Uno)
// OLED SDA → Arduino SDA (A4 on Uno)
Finding I2C Address
Run this code to detect your OLED’s I2C address:
#include <Wire.h>

void setup() {
  Wire.begin();
  Serial.begin(9600);
  Serial.println("I2C Scanner");
}

void loop() {
  byte error, address;
  int devices = 0;

  Serial.println("Scanning...");

  for(address = 1; address < 127; address++ ) {
    Wire.beginTransmission(address);
    error = Wire.endTransmission();

    if (error == 0) {
      Serial.print("Device found at 0x");
      if (address<16) Serial.print("0");
      Serial.println(address,HEX);
      devices++;
    }
  }

  if (devices == 0) Serial.println("No devices found");
  delay(5000);
}
Arduino Library Setup
- Install the Adafruit SSD1306 library from Library Manager
- Install the Adafruit GFX library
- Include these in your sketch:
Arduino
#include <SPI.h>
#include <Wire.h>
#include <Adafruit_GFX.h>
#include <Adafruit_SSD1306.h>
Basic Display Example
#define SCREEN_WIDTH 128
#define SCREEN_HEIGHT 64
#define OLED_RESET -1

Adafruit_SSD1306 display(SCREEN_WIDTH, SCREEN_HEIGHT, &Wire, OLED_RESET);

void setup() {
  display.begin(SSD1306_SWITCHCAPVCC, 0x3C); // Address 0x3C

  display.clearDisplay();
  display.setTextSize(1);
  display.setTextColor(SSD1306_WHITE);
  display.setCursor(0,0);
  display.println("Hello, OLED!");
  display.display();
  delay(2000);
}

void loop() {
  // Show sensor data or animations here
}
Advanced Features
Custom Graphics
// Draw a rectangle
display.drawRect(10, 10, 50, 30, SSD1306_WHITE);

// Draw a filled circle
display.fillCircle(64, 32, 15, SSD1306_WHITE);
Text Formatting
display.setTextSize(2); // 2x size text
display.setTextColor(SSD1306_WHITE);
display.setCursor(10, 10);
display.println("Large Text");

display.setTextSize(1);
display.println("Normal Text");
Bitmap Images
// Use LCD Assistant to convert images
static const unsigned char PROGMEM logo[] = {
  // Bitmap data here
};

display.drawBitmap(0, 0, logo, 128, 64, 1);
Animation
for(int i=0; i<128; i++) {
  display.clearDisplay();
  display.fillRect(i, 16, 10, 32, WHITE);
  display.display();
  delay(20);
}
Troubleshooting
Blank Display
- Check I2C address (try both 0x3C and 0x3D)
- Verify all connections are secure
- Ensure contrast is set (display.ssd1306_command(SSD1306_SETCONTRAST))
Garbled Display
- Check for proper voltage (3.3V-5V)
- Add pull-up resistors (4.7kΩ) on SDA/SCL if needed
- Reduce I2C clock speed if using long wires
Library Issues
- Install latest Adafruit libraries
- Modify library if using SH1106 driver
- Check for conflicting libraries
Related Posts
MG90S Mini Digital 180° Servo
MG90S Mini Digital 180° Servo
Metal Gear, 2.2kg·cm Torque for RC and Robotics
Introduction
...
XKC-Y25-V Non-Contact Water Liquid Level Sensor
XKC-Y25-V Non-Contact Water Liquid Level Sensor
Capacitive Detection Without Physical Contact
...
Waterproof Ultrasonic Obstacle Sensor, Sensor with Separate Probe
+
Waterproof Ultrasonic Obstacle Sensor
Distance Measurement with Separate Waterproof Probe
...
Water Level Depth Detection Sensor
Water Level Depth Detection Sensor
Liquid Measurement for Arduino and IoT Projects
Introduct...
VL53L0X Purple Laser Distance Sensor Module
VL53L0X Laser Distance Sensor Module
High-Speed, High-Precision Time-of-Flight Distance Measurement
...
TCS34725 RGB Color Sensor Module
TCS34725 RGB Color Sensor Module
High-Accuracy Digital Color Detection with IR Filter
Introd...
TCS3200 Color Sensor Module
TCS3200 Color Sensor Module
Precise RGB Color Detection for Arduino and Embedded Projects
In...
PN532 NFC RFID Read/Write Module V3 Kit
PN532 NFC RFID Read/Write Module V3 Kit
Advanced Near Field Communication for Arduino and Embedded Systems
...
HC-SR501 PIR Motion Sensor Module
HC-SR501 PIR Motion Sensor Module
Passive Infrared Detection for Security and Automation Projects
Flex Sensor 5.6 cm (Detect Bending Motion)
Flex Sensor 5.6cm
Bend Detection Sensor for Arduino and Wearable Electronics Projects
...
ACS712 Current Sensor Module
ACS712 5A Current Sensor Module
Hall-Effect Based AC/DC Current Measurement for Arduino Projects
AS608 Optical Fingerprint Sensor Module
AS608 Optical Fingerprint Sensor Module
High-Precision Biometric Recognition for Arduino and Microcontroller P...

Recent Comments